 007. 기본 설정 추가 및 실행
이전까지 기본 프로젝트를 생성하였다면 이번에는 간단한 설정을 추가하고 실행을 해보도록 하겠습니다. 상세 설명은 없습니다. 지금은 그냥 실행만 해보는 겁니다. 1. 기본 설정 추가 application.properties SpringMVC 설정 2. 테스트 파일 생성 3. 실행 및 테스트 1-1. application.properties 내용 추가 #web server server.port=8081 server.contextPath=/ # graceful shutdown server.shutdown=graceful #SESSION server.session.timeout=1800 #file updoad #spring.http.multipart.enabled=true #spring.http.multipart..
 006. 사용자 배너 추가
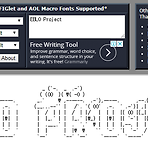
1. Overview spring boot 애플리케이션이 시작될 때 상단에 보여 주는 배너를 바꿔보겠습니다. 2. 배너 만들기 구글에서 검색하면 배너를 생성하는 사이트를 많이 찾을 수 있습니다. 제가 이용해 본 곳 두 곳 링크를 남깁니다. http://patorjk.com/software/taag/#p=display&f=Ghost&t=EBLO%20Project https://devops.datenkollektiv.de/banner.txt/index.html 해당 사이트에서 배너를 만든 후 banner.txt 이름의 파일을 만듭니다. 3. 스프링부트에 배너 추가하기 [프로젝트]/src/main/resources/banner.txt 해당 위치에 가져다 놓으면 아무런 설정 없이 적용이 되는 것을 확인 할 수 ..
Stereotype-annotation Annotation 역할 @Component Spring에서 Annotation 기반으로 자동으로 Dependency Injection을 하는 @Controller, @Service, @Repository, @Configuration은 모두 @Component이고 이를 확장하여 사용하는 것으로 최상위 개념이다. @Controller Controller 명시, Presentation Layer에서 사용 @Service Service 명시, Business Layer에서 사용 @Repository DAO 명시, Persistence Layer에서 사용 @Configuration 설정 관련 bean 알고 보면 모두 @Component이지만 역할에 따라 다른 이름으로 구분..
 004. 롬복(lombok)
롬복(Lombok 홈페이지 - projectlombok.org/ Project Lombok projectlombok.org Download - 롬복 사이트에 가서 상단 download 페이지로 이동 후 다운로드 받으면 됩니다. - projectlombok.org/download Download projectlombok.org Install - 다운로드 받은 디렉토리로 이동 후 실행합니다. java -jar lombok.jar Specify location에서 설치하려는 이클립스 디렉토리를 설정하고 install / update 버튼을 클릭하면 끝납니다. 프로젝트에서 이용하기 위한 Dependencies 추가 - spring boot이라면 build.gradle에서 사용하는 프로젝트 추가해주면 됩니다. d..
 003. 스프링부트 프로젝트 구조 이해
1. Web Application 일반적인 구성 - 디렉토리 - WEB-INF - lib - classes - web.xml 2. Springboot 프로젝트 기본 구성 src/main/resources - static : 정적 컨텐츠(image, html, css, js) 디렉토리 - static - js - css - html - images favicon.ico - templates : view 관련 jsp, thymeleaf, freemarker 등의 리소스 디렉토리입니다. application.properties / application.yml - 레거시 형태의 스프링 이용 시 서버를 추가하고 포트, 컨텍스트, 세션 타임 아웃, post 파일 사이즈, jndi 등을 설정했습니다. 스프링부트는 내..
 002. 프로젝트 생성
1. Spring Starter Project 생성 2. 기본 설정 Name - 프로젝트명 Type - Maven / Gradle 빌드 및 프로젝트 형태. 둘다 많이 사용합니다. Packaging - Jar / War 선택 jar / war 선택에 따른 차이 비교 프로젝트 구조 jar war war 선택 시 ServletInitializer.java와 src-main-webapp 추가됩니다. 패키징 비교 jar war 실행 형태 jar : java -jar study-springboot-0.0.1-SNAPSHOT.jar war : java -jar study-springboot-0.0.1-SNAPSHOT.war 예전에는 외부 서버에 서비스 하기위해 war 형태로 패키징을 했지만 요즘 클라우드에서 서비스를..
 001. 개발환경 설정
1. 이클립스 설치 - 최신 설치 2. 플러그인 추가 - Gradle IDE Pack 3.8.x + 1.0.x - SpringSource Tool Suite (STS) for Eclipse - properties editor 추가 Help > Install New Software... > Add... Name : properties editor Location : https://propedit.osdn.jp/eclipse/updates/ 목록에서 Properties editor만 선택. 3. Mysql 설치 - DB 작업 create database `dev_kkaok` character set utf8 collate utf8_general_ci; create user 'dev_kkaok_user'@'%..
스프링 레퍼런스 https://docs.spring.io/spring-boot/docs/current/reference/html/ 스프링 가이드 https://github.com/spring-guides https://spring.io/guides#getting-started-guides 스프링부트 https://spring.io/projects/spring-boot Exception 처리 https://spring.io/blog/2013/11/01/exception-handling-in-spring-mvc baeldung https://www.baeldung.com/rest-with-spring-series https://www.baeldung.com/persistence-with-spring-seri..
- Total
- Today
- Yesterday
- 메시지
- REST
- 설정
- UI
- 스프링
- springboot
- mybatis
- Spring Boot
- oracle
- 타임리프
- cache
- mapToList
- Javascript
- restful서비스
- SHEETJS
- lombok
- RESTful
- spring
- 샘플
- thymeleaf
- java
- sample
- example
- 예제
- 스프링부트
- listToMap
- 그리드
- AG-GRID
- 엑셀
- ag grid
| 일 | 월 | 화 | 수 | 목 | 금 | 토 |
|---|---|---|---|---|---|---|
| 1 | 2 | 3 | 4 | |||
| 5 | 6 | 7 | 8 | 9 | 10 | 11 |
| 12 | 13 | 14 | 15 | 16 | 17 | 18 |
| 19 | 20 | 21 | 22 | 23 | 24 | 25 |
| 26 | 27 | 28 | 29 | 30 | 31 |
